Mesh contains an in-built capability of manipulating the image data, stored in the binary content fields.
Feature control
This capability is controlled by the Mesh options item image.mode with the following options:
* ON_DEMAND: Each time a manipulation is requested via image manipulation query parameters, the new variant is created automatically in the image cache and served to the user.
* MANUAL: Each image manipulation variant has to be manually created in advance, using variants manipulation REST API. Only the manually created variants are allowed to serve over the requests with image manipulation query parameters. Other variant control capabilities are available throught the REST API, including creation-on-publish and access over webroot and webrootfield.
* OFF: No image manipulation possible.
Manipulation features
Images can be resized and/or cropped by appending the image manipulation query parameters on the relevant API endpoints.
The following image formats are supported: png, jpg, bmp, gif and webp.
Resize
Using UUID
Endpoint: /api/v2/:projectName/nodes/:uuid/binary/:fieldname?w=220
|
Try the example
https://demo.getmesh.io/api/v2/demo/nodes/df8beb3922c94ea28beb3922c94ea2f6/binary/image?w=500
|
Using Path
Images can be loaded similar to regular contents. It is also possible to load them using the WebRoot path.
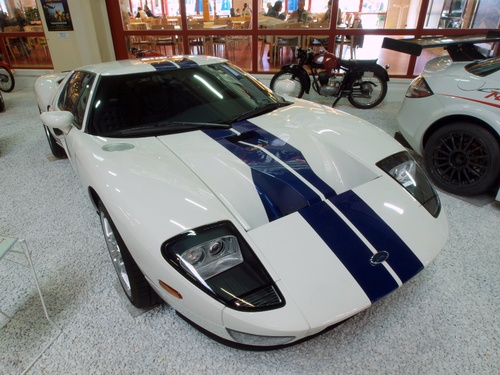
Resizing Options
When loading an image with resizing parameters you can provide either the desired width by appending w=:width or the desired height by appending by appending h=:height.
Smart resizing and Cropping
It also possible to provide both dimensions. Note that in this case Mesh potentially crops your image to fit the desired dimensions. This happens when the aspect ratio of the source image is different from the requested dimensions. In these cases Mesh will crop either pixels at the top and bottom or left and right. Mesh supports the auto dimension when manipulating an image.
If auto is used in width or height then mesh will use the original value when cropping the image.
Providing no resize parameter yields the same result as providing resize=smart
|
Should you not want to crop the image but still have Mesh transform the image to fit the requested width and height you also have other options:
Proportional resizing
To make sure the requested image fits inside the provided dimensions you can provide the paramater resize=prop. This scales the image proportionally - but the resulting image can potentially hava a different aspect ratio than the requested dimensions. In practice the resulting image will often only have either the correct width or the correct height - but it will fit the provided 'bounding rectangle'.
Forced resizing
You can use the resizing option resize=force to request the source image with exactly the requested width and height and without cropping.
Note that using the force-resizing mode can potentially lead to non-proportional resizing and thus potentially distort your image.
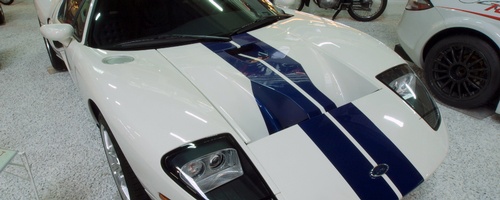
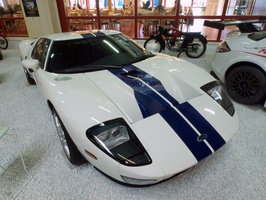
prop the image gets scaled proportionally to fit the dimensions.
force the image gets distorted to fit the dimensionsCrop
You can also selectively extract a certain portion of your image by providing a cropping rectangle with the paramater rect=:startPositionXCoordinate,:startPositionYCoordinate,:WidthOfRectangle,:HeightOfRectangle&crop=rect.
| It is mandatory to specify all four crop parameters when cropping an image. |
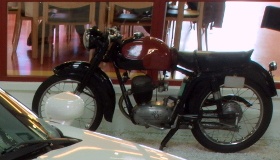
| Cropping can also be combined with resizing. |
Placeholders
You can use the dominantColor, width and height properties of the image fields to generate colored placeholder areas for your images. The dominantColor of the image will automatically be computed for each uploaded image.
|
It is also possible to use the image manipulation in combination with the WebRoot endpoint.
Endpoint: /api/v2/:projectName/webroot/:path?rect=10,100,800,400&crop=rect
Focal Point
Responsive designs often suggest the usage of srcset images for responsive images. Sometimes those designs require image sizes which lead to cropped images. This could result in images which seem chopped off at the worst possible place or images which miss the important part.
You can however use the focal point feature in order to influence how the image should be cropped. Gentics Mesh will use the focal point information when cropping the image so that the focused area will remain in the image.
First you need to specify a focal point along with your image.
You can store the focal point information within the binary field of your image or use the fpx and the fpy query parameters when loading the image.
You can also use these parameters to override the stored focal point.
The width and height information via w and h parameter are also needed when loading the image.
Otherwise Gentics Mesh can’t tell which area of the image needs to be cropped.
Finally the fpdebug parameter can be used to visualize the focal point. This is useful when testing designs and resize parameters.
|
Try the example
https://demo.getmesh.io/api/v2/demo/webroot/images/ford-gt.jpg?fpx=0.5&fpy=0.4&w=800&h=600&crop=fp&fpdebug=true
|
In some cases you may want to show just a single area of the image. In this case you can use the fpz zoom parameter to zoom to the focal point area.
|
Try the example
https://demo.getmesh.io/api/v2/demo/webroot/images/ford-gt.jpg?fpx=0.5&fpy=0.35&fpz=3.0&w=800&h=600&crop=fp&fpdebug=true
|
It is also possible to store focal point information along with the binary field. This way you can set the focal point once and omit it within the image request.
In those cases it is not needed to specify the fpx and fpy parameter. Gentics Mesh will automatically load the missing parameter from the binary field if possible.
|
Try the example
https://demo.getmesh.io/api/v2/demo/webroot/images/ford-gt.jpg?fpz=1.2&w=800&h=600&crop=fp&fpdebug=true
|
Responsive Design
You can use the focal point feature to mark the point of interest in your images. That information can be used to generate different size sets of your images. Different image sizes may be required by your responsive design. The focal point will be used by Gentics Mesh to crop the image in the desired way.
Updating Focalpoint
The focal point can be updated by updating the node which contains the binary field.
POST /api/v2/demo/nodes/df8beb3922c94ea28beb3922c94ea2f6

{
  "language": "en",
	"version": "draft",
  "fields": {
    "image": {
      "focalPoint": {
        "x": 0.9,
        "y": 0.7
      }
    }
  }
}
Alternatively the focal can also be set when transforming the binary field.
Example Request:
POST /api/v2/demo/nodes/df8beb3922c94ea28beb3922c94ea2f6/binaryTransform/image

{
  "version" : "1.0",
  "language" : "en",
  "width" : 300,
  "focalPoint": {
    "x": 0.2,
    "y": 0.4
  }
}
Transform and Update an Image
Gentics Mesh also allows you to transform (i.e, crop and/or resize) and overwrite an image in a single step. The image manipulation parameters then are part of the request body. This will effectively override the currently stored image with the image of the resulting operation.
Endpoint: POST /api/v2/:projectName/nodes/:uuid/binaryTransform/:fieldname
Example Request:
POST /api/v2/demo/nodes/df8beb3922c94ea28beb3922c94ea2f6/binaryTransform/image

{
  "version" : "1.0",
  "language" : "en",
  "width" : 300
}
Image Manipulation Query Parameters
| Name | Type | Mandatory | Description |
|---|---|---|---|
crop |
string |
false |
Set the crop mode. Possible modes: rect : The rect mode will work in combination with the rect parameter and crop the specified area. fp : The fp mode will utilize the specified or pre-selected focal point and crop the image according to the position of the focus point and the specified image size. |
fpx |
number |
false |
Set the focal point x factor between 0 and 1 where 0.5 is the middle of the image. You can use this parameter in combination with the crop=fp parameter in order to crop and resize the image in relation to the given point. |
fpy |
number |
false |
Set the focal point y factor between 0 and 1 where 0.5 is the middle of the image. You can use this parameter in combination with the crop=fp parameter in order to crop and resize the image in relation to the given point. |
fpz |
number |
false |
Set the focal point zoom factor. The value must be greater than one. |
h |
number |
false |
Set image target height. The width will automatically be calculated if the height was omitted. |
rect |
string |
false |
Set image crop area. |
resize |
string |
false |
Set the resize mode. Possible modes: force : The force mode will resize the image to the specified dimensions. This can lead to a distorted image when the aspect ratio of the source image does not match the destination aspect ratio smart : The smart mode will resize the image proportionally so that the resulting destination format matches the source format in at least one dimension. No distortion of the image will occur. prop : The prop mode will resize the image proportionally so that the resulting destination format fits inside the provided dimensions. No distortion of the image will occur. |
w |
number |
false |
Set image target width. The height will automatically be calculated if the width was omitted. |
Find out more about this topic in our blog post about Gentics Mesh’s Image Manipulation API and Interface.